This post is about something that has changed the way I cook specific dishes and the best part about it, is that you can replicate perfect results every. single. time. with very minimal effort. You might be thinking that this sounds too good to be true, but I would not be writing this blog post if it was.
This is the first post in a series on Sous Vide for complete beginners and I'll have Steak in mind as usually this is everyone's first Sous Vide attempt, but Sous Vide is great for a lot of things! It's great for beef, poultry, fish, vegetables, Eggs (like the Egg Bites from Starbucks and especially hard boiling!) and even desserts like cheesecake.
The second post we'll talk about equipment, but first we need to talk about the process and touch on a bit of the science as well. I am not an expert in Sous Vide, nor will I touch on all the various methods to cook everything. This post will focus on the basic understanding to remove some of the confusion and put some clarity around what's going on and I hope that it will motivate you to give Sous Vide a try!
What is Sous Vide anyway?
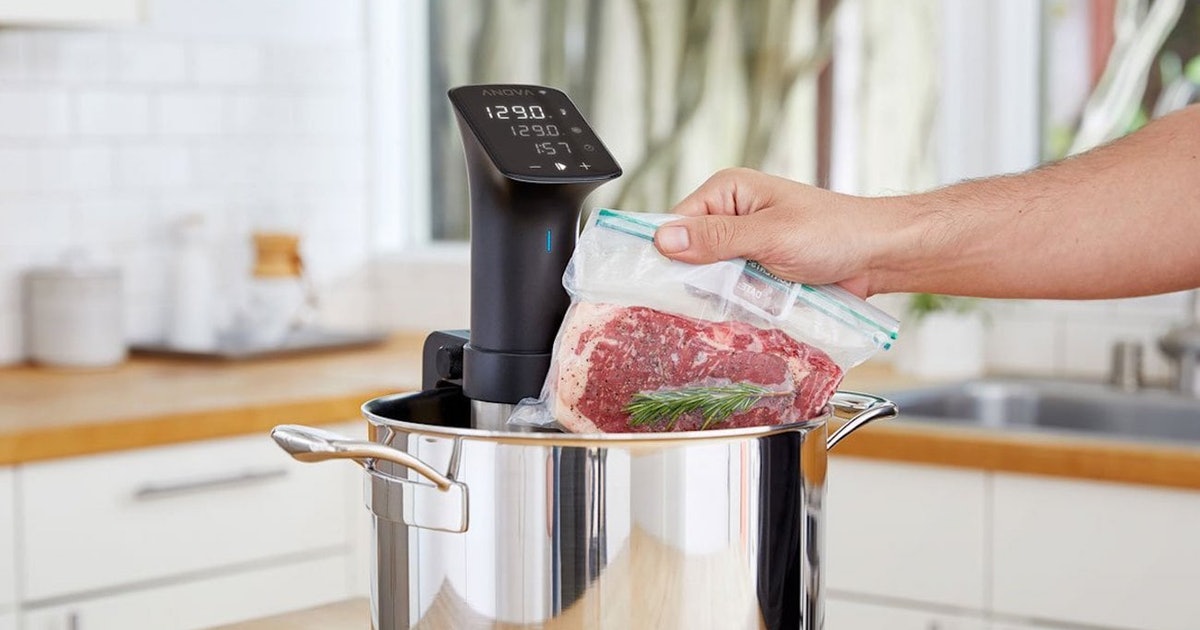
Sous Vide is french for under vacuum and it's a cooking method that heats a medium, in this case water and keeps it at a precise temperature. A Sous Vide immersion circulator both heats the water to the desired temperature and circulates it around the food you are cooking. Since the heat will never go above your desired temperature set point, your food can never overcook or burn during this process. This gives us a number of great benefits, at least these are the reasons why I love it:
Fool Proof Accuracy and Repeatable Results
Once you've determined your temperature setpoint for your favorite foods, you can really "set it and forget it" and when it's finished, you'll have the same results as you had the last time. Taking all of the guess work out of the process. You'll make that steak the same way, perfect every, single, time.
Set it and Forget it
Sous Vide can be very forgiving on time. It's true that most foods need to be cooked for at least a certain amount (If you're interested, please research food safety rules and how Sous Vide plays a role in this). But for the most part, once your food has been in the water for enough time to fully cook it, that temperature doesn't change, so it could stay in there for another hour if you're not ready to eat yet, or another few hours if you need to run an errand.
Some meats can change their texture after too long (for example: I'd never keep a steak in past 5 hours) read more below on this topic.
Re-heating cooked meals or foods
Since the temperature will never raise above the setpoint, you can set a warm temperature and then place a prepared vacuum sealed plate into the water bath. It'll warm everything through without drying out or burning your meal. It's really a great way to re-heat things.
Time and Temp
You'll hear this question get asked by almost everyone on forums and Facebook groups and it's funny because if it's beef it's usually always going to be the same range of temperature 129F to 135F for medium rare to medium and for about 1 to 3 hours (depending on how much time you have). For tougher cuts of meat you'll often hear people suggest 10, 12, 24+ hours and you can do this- it works great with short ribs. Keeping with the theme of steak, I'll discuss my thoughts on time and temp with a regular NY Strip or Ribeye.
Time
This can be a heavily debated topic and I won't get into all of the discussions surrounding it. For Steak, it does depend on thickness (and the thicker the better for Sous Vide) so to be safe, at least 2 hours in the Sous Vide water bath is enough to cook the steak through and be ready for finishing (more on that down below). However the longer you can keep your steak in the bath, the more the fat will melt and become softer leading to an amazing taste experience. I personally found that three and a half hours is best for this result. You can leave your steak in for 4 hours if needed, but the texture begins to change after that. Check out Serious Eat's Food Lab's blog regarding this here.
Temp
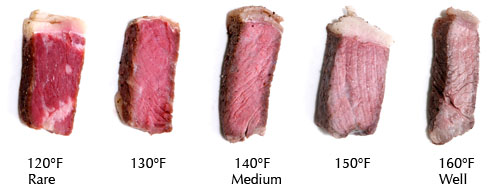
Medium rare is considered from about 129F to 135F. I would never cook a steak higher than 135F. The beauty about Sous Vide is experimentation, while this is a science, it's also an art form when it comes to time and temp. Want your steak a bit more tender? try reducing the temp a degree point or two. I've tried every temperature in this range and I've found that 132 is perfect for the way I prefer my steak, but I would encourage you to experiment and find what you like.
The Maillard Reaction and the Gradient
Let's touch a bit on the Maillard Reaction. When you take your steak out of the vacuum sealed bag after it's been in the Sous Vide for a few hours you'll think to yourself "Wow, this doesn't look appetizing at all. This was a waste of money". It's true, it will look grey, and really not appetizing at all. However you have to visualize what's going on here. Let's take a cooking a steak with the regular method in a pan or on the grill:
Traditional Method
The surface of the steak is coming into contact with as much heat as possible. Giving it a nice browned crust and starting to cook the inside. You'll need to keep applying heat for the steak to reach the doneness you desire in the center. All the while, the outside, and the inside that is closest to the outside, begin to cook more and more until the center reaches medium rare. The steak is finished, but we have a large gradient of doneness from outside to inside
Sous Vide Method
The steak goes into a vacuum sealed bag and placed into a water bath circulating at 130F. The steak warms and cooks up to the temperature of the water 130F. From the outside edges to the center, the entire steak cooks to 130F and it cannot exceed this temperature because the heating medium is not exceeding it. When you take the steak out after an hour, it's cooked perfectly, but it looks nothing like the regular steak, why?
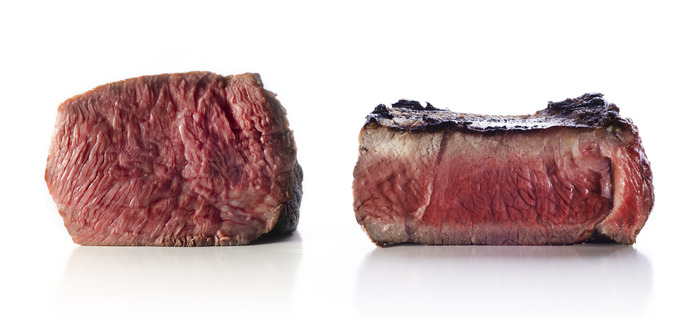
The Maillard Reaction is really what us humans love about a steak. This chemical reaction is what creates the crunchy exterior with the soft tender interior. This is the browning and searing that we did first in the normal method. It's the same process that occurs when we roast coffee beans or caramelize onions (for making amazing Grilled Cheese)
In Sous Vide, this process usually comes last which is why it's often called finishing.
Finishing your Sous Vide
Not all food cooked Sous Vide will require finishing, and in reality, everything is ready to consume when it comes out of the Sous Vide, but it's not always what we expect. Desserts like cheesecake or vegetables like Asparagus won't need to be seared after they come out, but your proteins will.
But How?
You can sear anyway you like! Once you take your steak out of the bag make sure to thoroughly pat it dry with paper towels. You want the surface to be as dry as possible so the Maillard Reaction can take place (otherwise the liquid will turn into steam) Throw your Sous Vide cooked steak into a screaming hot pan with a bit of oil (Cast Iron for best results) for about a minute per side is one way. Use the broiler function in your oven, or you can throw it on a grill for a minute per side, or you can use my favorite method: a blow torch:
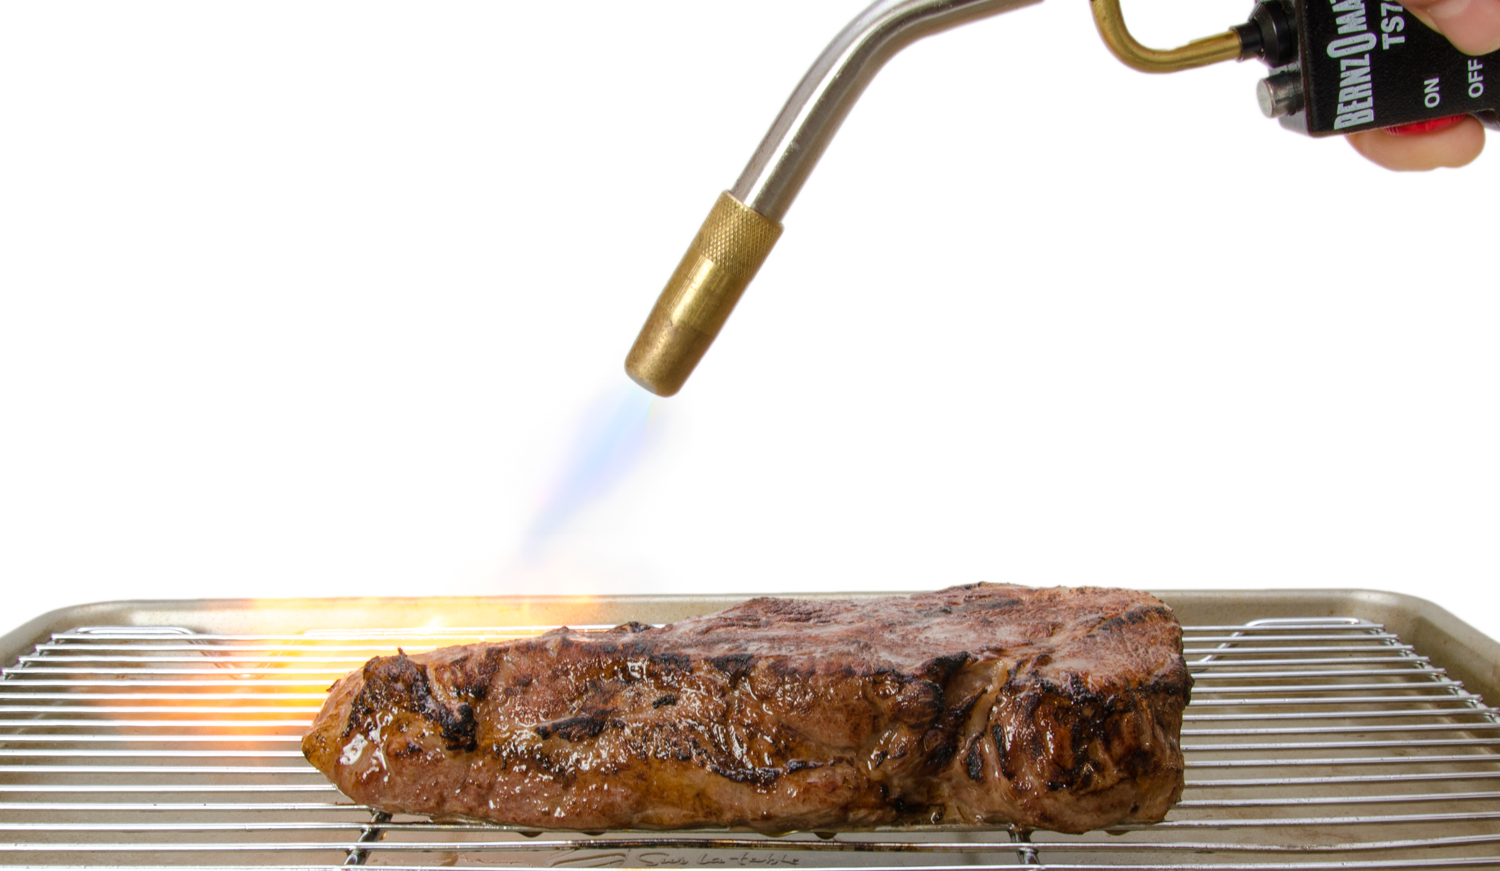
It will take some practice to get it just right so don't worry! Another tip is to let the steak cool a bit before searing so that the insides don't over cook as much either. You're really only adding a crust onto your perfectly cooked steak so you don't need to sear for too long and remember the Gradient- you want to keep your steak from cooking over the temperature you set for your Sous Vide water bath.
Bon Appétit!
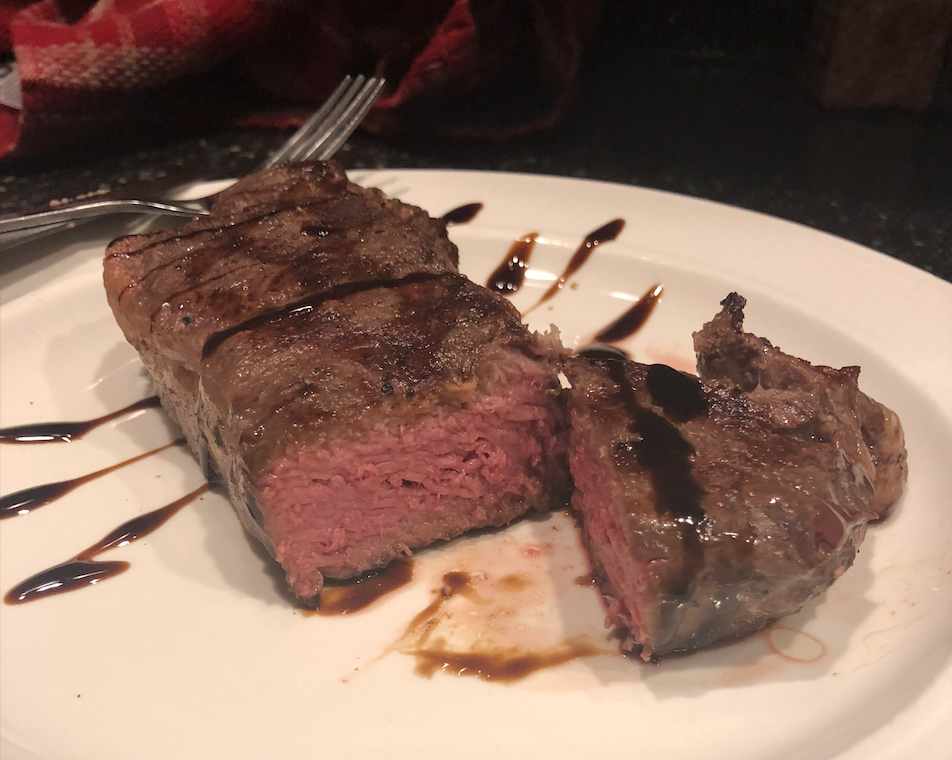
I like to drizzle a Balsamic glaze reduction over and finish with Maldon Sea Salt Flakes over my steak whether it's a New York Strip or RibEye. You don't need much else!
Since you made it this far, click here for Sous Vide 102: Equipment for Getting Started and enjoy your new culinary journey!